When working on Zenith, Model A carburetors there are some tasks, which are made easier or more effective with "Special Tools," that may not already exist in one's tool box. These are the ones that I use the most.
Dremel Stone #911
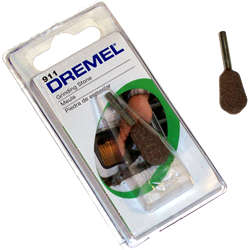
- The upper casting fuel inlet port seat must mate smoothly with fuel line compression ferrule. However, castings which have experienced a lot of rust will have seats that are pitted. These ports need to be lightly ground to remove the pits.
- A Dremel #911 stone, shown in the picture, works well as a grinding stone.
- Care must be taken to centrally position the stone, and only very lightly polish the seat.
ˆ Top of Page • Upper Casting Passages
Drilled Out 9/32 Nut Driver

- It's difficult to install or remove Idle Jets with standard tools.
- To remove and install Idling Jets, a 9/32" Nut Driver with a very deep throat is needed.
- Drilling a driver socket out with a long drill, allows clearance for the long stems of the jets
ˆ Top of Page • Idle Jet
Fiber Optic Light
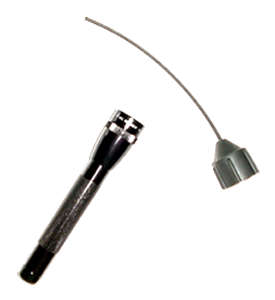
- It's difficult to see the condition of casting passages.
- "Maglite" flashlights now provide a fiber optic adapter that can be pushed over their small flashlights for illuminating small areas. It works great for seeing the inside of carburetor passages. Stick the fibers into one end of the passage and observe the other end of the passage.
ˆ Top of Page • Upper Casting Passages • Lower Casting Passages
Float Tester
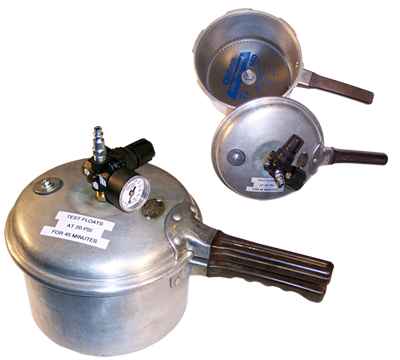
- Some floats have very small holes which allow fuel to seep in over a long period of time.
- This special tool is a modified pressure cooker, which provides for exposing floats submerged in liquid to pressure. Caution! This float tester and its contents should not be exposed to any heat source. This forces the liquid into the float at an accelerated rate. Currently, I submerge the floats in thinner at 20 psi for 45 minutes. After depressurizing the container, the floats with leaks are easily identified by weight or by shaking them and listening for the sound of fluid. This is an efficient way to test floats in quantity.
- An alternative to using this float tester is to submerge floats into boiling water. The expanding air inside the float tends to bubble out of any holes. Use caution to prevent burns.
ˆ Top of Page • Float Valve and Float
Fuel Level Sight Tube

- A tool is needed for measuring true fuel level in the main fuel well.
- This tool is for measuring true fuel level regulated in the main fuel well by the float and valve. One can be obtained from most Model A parts suppliers or you can likely make one yourself.
- To use it: Turn fuel valve off and drain gas from carburetor bowl as you remove drain plug. Screw Fuel Level Sight Tube into drain hole. Turn fuel valve on. As the gas fills the carburetor float bowl, it will fill the sight tube to the same elevation as inside the bowl. The fuel level should be 9/16" to 5/8" below the seam of the halves of the carburetor. Adjust float level by adding or reducing gasket thickness under float valve. If the tube or wire gets a sharp bend or a kink, the accuracy can be considerably off.
ˆ Top of Page • Testing Newly Installed Carburetor • Float Valve and Float
Gas Adjusting Valve Seat Honing Tool & Guide
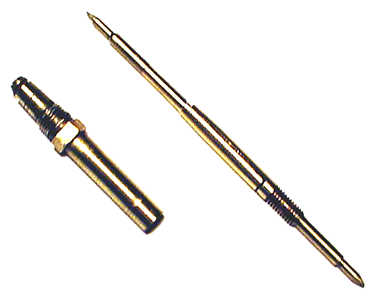
- To obtain a good seat when Gas adjusting valve is closed, the seat sometimes needs to be polished to remove pits, dirt scratches, etc. This tool and guide provides a mating, aligned surface that can be spun against the seat with polishing compound on it. The tool is made by soldering two needles together back to back. The end that will go into the guide and provide the polishing surface needs to have its threads removed to enable it to be spun continuously with a drill. Using an old GAV housing, I've removed the spring to let the tool spin more freely. Some people also cut down both ends of the housing.
ˆ Top of Page • Gas Adjusting Valve (GAV) and Seat
Gas Adjusting Valve Wrench

- GAV Housing hex nut may be either 7/16" or 13/32". The 7/16" was used until September of 1930 and there after the 13/32" was used. The 7/16" open wrenches are readily available, but 13/32" wrenches are very hard to find. So, I've carefully filed out an open 3/8 wrench to snuggly fit 13/32 housing hex nuts. I've painted the arm of the wrench so that it is readily identifiable and isn't confused to be the original 3/8 wrench.
ˆ Top of Page • Gas Adjusting Valve (GAV) and Seat
Heli-Coil Thread Repair Kits

- Sometimes threads are stripped or cross-threaded, especially the ones for the mounting flange bolts (5/6-18). Heli-Coil Thread Repair kits are available for this size at some hardware stores and most machine tool stores. The kit inserts are precision coils of stainless steel, diamond-shaped wire. The kit has a toll called a tang for installation, which is notched for easy removal. The insert is larger than the tapped hole before installation. During installation, the insert is compressed so it will enter the tapped hole. After installation, each coil expands outward to permanently anchor the insert. Since the insert is made of wire, it automatically adjusts itself to any expansion or contraction of casting.
ˆ Top of Page • Casting Threads • Disassembly of a Zenith Model A Ford Carburetor
Jet Flow Testing Setup
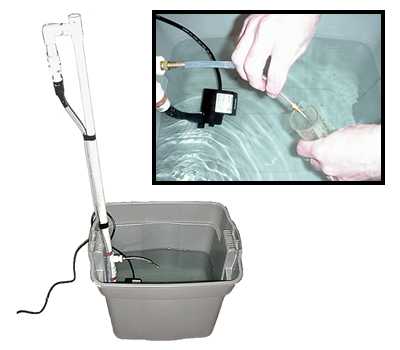
- I recommend flow testing and resizing jet, which have been soldered and re-drilled.
- These photos show my setup which pumps water up a pipe to obtain a consistent column of pressure. Water is measured into a beaker. For improved accuracy, the tube/jet should be held horizontally and not tipped down as shown in photo.
- To learn more about flow testing see "Zenith Model 'A' Carburetor Restoration Guidelines".
ˆ Top of Page • Main Jet • Cap Jet • Compensator Jet • Idle Jet
Small Drill Sets
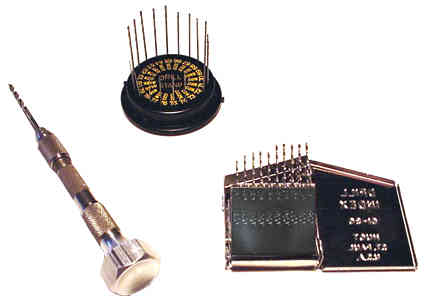
- When resizing jet orifices, you solder the jet closed and drill it out with very small drill bits. The photo shows two different very small drill bit sets that I have found available at some hardware stores. They contain #61 to #80 drills (.039 to .0135"), which easily covers the range needed for jets. I use a Pin Vise (as shown in photo) to drill the holes by hand.
ˆ Top of Page • Main Jet • Cap Jet • Compensator Jet • Idle Jet
Throttle Shaft Bushing Drill Fixture Plate
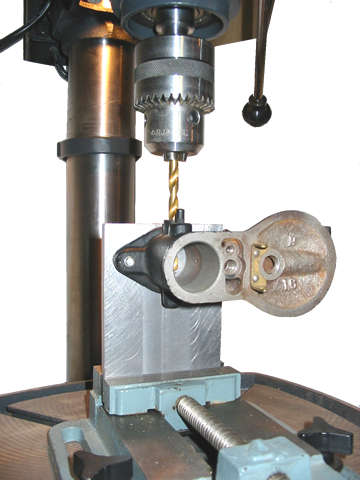
- To add bushings for sloppy throttle shafts, upper castings need to be properly drilled. This precision machined fixture plate aids in accurately locating the drill position. First, use a drill, which fits snuggly, into existing throttle shaft holes. Mount casting onto fixture plate and position into vise on drill press, aligning drill in chuck. Without moving fixture in vise, replace drill with a 5/16" drill and drill out hole. Tap in bushing, with knurl end facing out, using soft hammer or piloted drift. If a heavier press fit is used the hole may have to be ground or resized using a 9/32" drill or reamer. To install bushing by bonding using an epoxy or super bonders, use "O" (.316") drill size. The inside blind hole is not normally re-bushed. If it is, the bushings will need to be shortened.
ˆ Top of Page • Upper Casting Passages
Venturi Extraction Tool
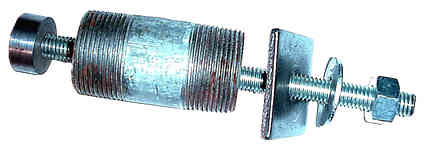
- Even after heating carburetors up with a torch, A Venturi can be difficult to remove from casting. This fixture is very effective for pressing out even very stubborn ones. It's made up of materials found at most hardware stores and one special machined steel disk at the left side of the photo. It has a 1.1875-inch outside diameter, is 1/2" long, and is drilled 3/8" deep and tapped for 1/2" Std thread. The pipe has a 1 and 3/8 inch inside diameter. I had to grind out inside burrs for Venturi to slide easily through it. Tightening the 1/2-inch nut pulls the Venturi out of the castings.
ˆ Top of Page • Venturi • Castings
Choke Driver with Wing Nut
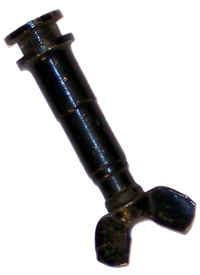
- When dis-assembling carburetors that have corroded, the Gas Adjusting Valve (GAV) needle is sometimes difficult to remove.
- A wing nut has been brazed onto a choke driver, which provides a better grip when turning needles that do not want to come out.
- After removal of the needle and house, it's recommended that the threads be chased with a 1/4-24 tap and die.